
What it is
Delegation shares one of your robots with another team — a customer's team, a partner's team, or another team of your own. You decide the level: "Read" lets the other team view the robot; "Read & Write" lets them operate it. The robot stays on your account and in your fleet either way. Teams and their members are managed under Users and Access.
Who uses it
Managers who coordinate robots across teams — lending a robot for a joint site, or receiving one for a limited job. Only Managers see the "Delegate to Team" action.
Steps
Delegate one robot
- Open "Robots" and select the robot you want to share.
- Open "More" in the robot's top-right menu and choose "Delegate to Team".
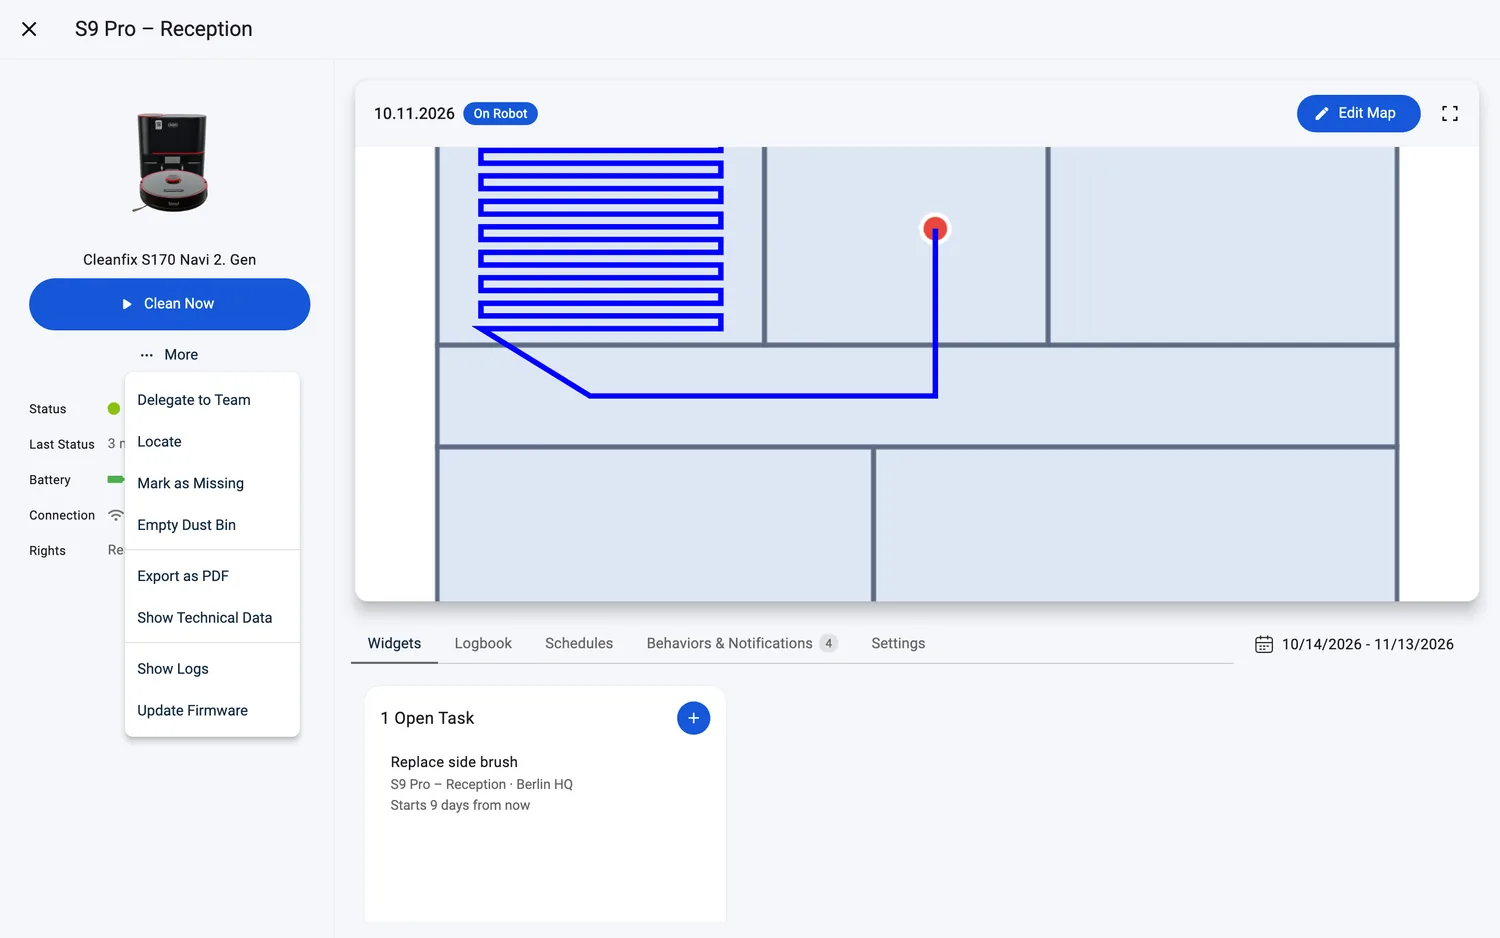
- In the dialog ("Delegate "‹robot name›""), pick the receiving team from the "Team" dropdown.
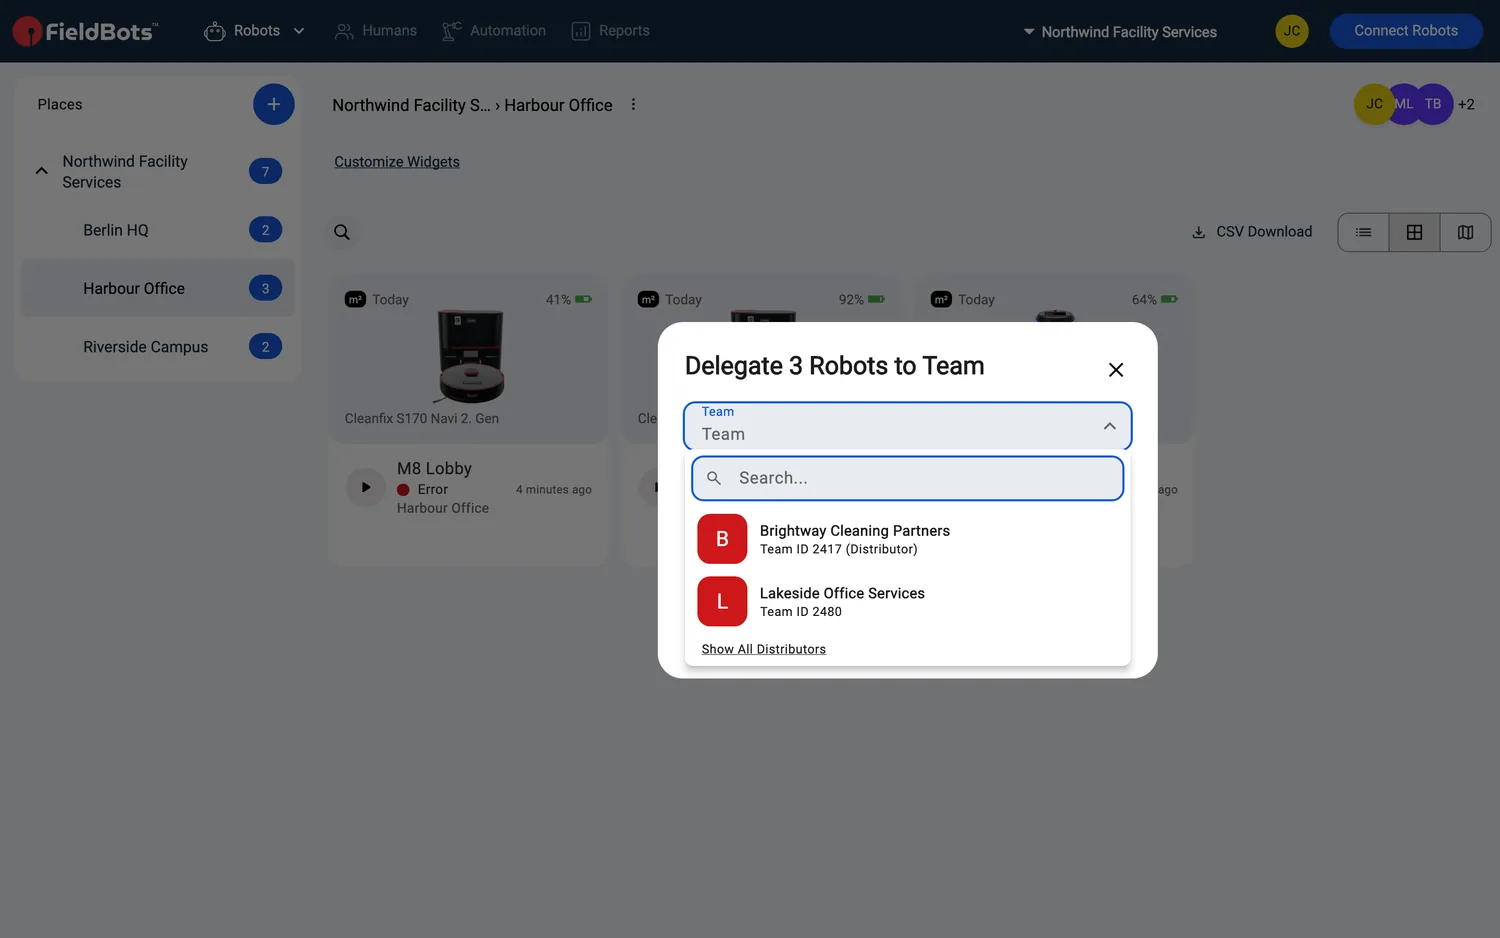
- Your own teams come first, followed by the distributor the robot came from and your team's distributor. Click "Show All Distributors" for everyone else.
- Under "Permission Level", choose "Read" or "Read & Write".
- Optional: switch on "Data Window" and pick a "Start" and an "End" date.
- With "Read & Write" selected, read the warning: "Attention: By delegating read and write permissions, you will retain only read permission for this robot. This action cannot be undone."
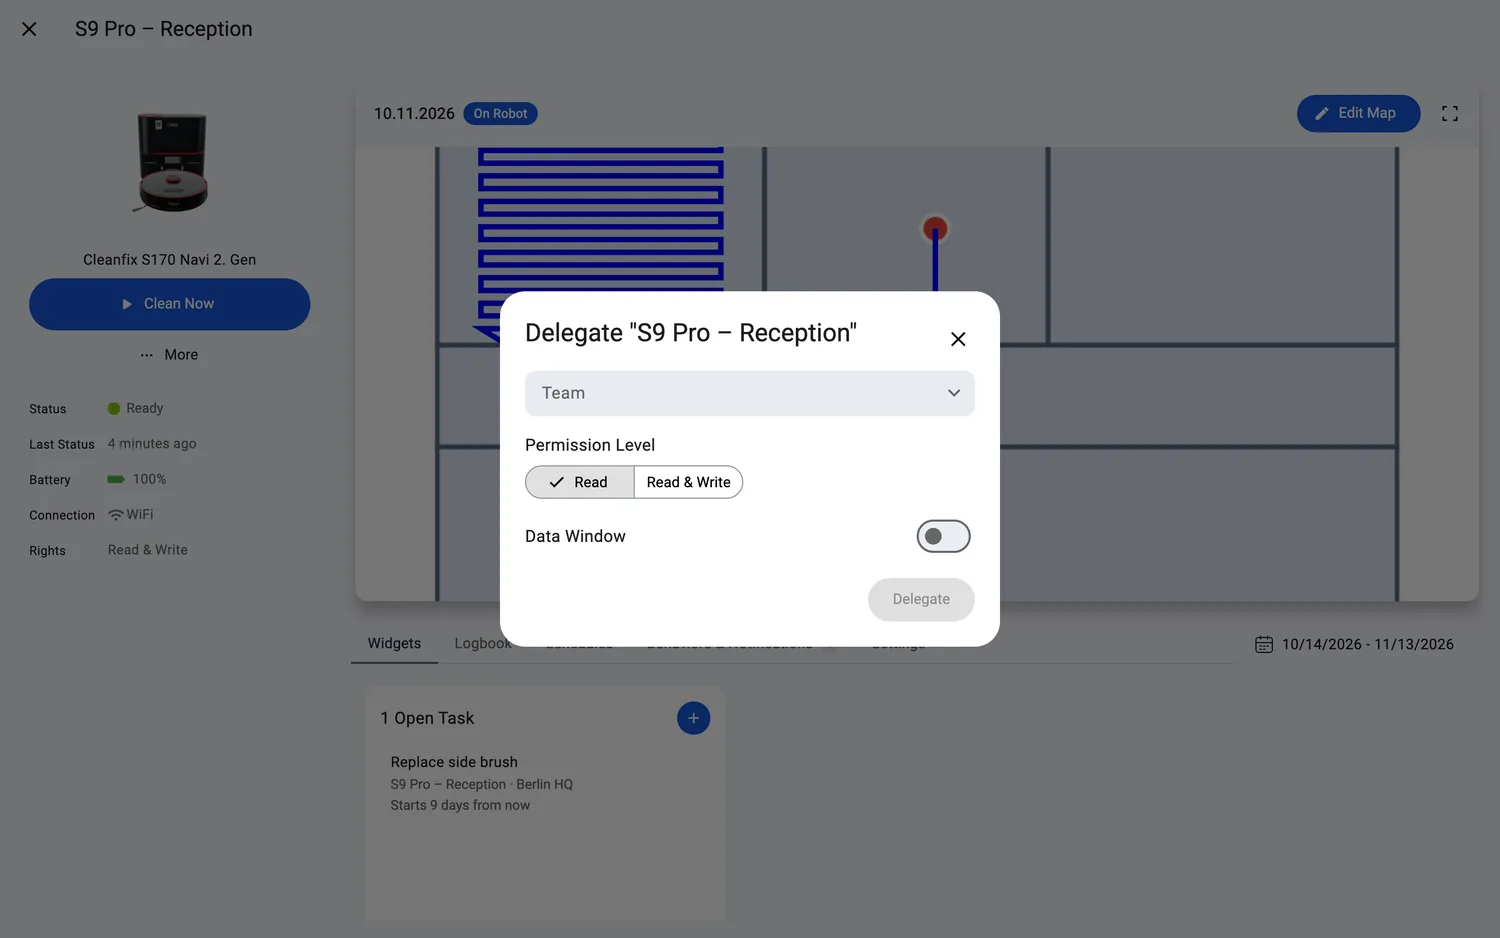
- Click "Delegate". A confirmation reads "Bot delegated successfully".
- Teams that already hold the robot are not offered. If a duplicate gets through to the server anyway, it answers "This robot is already delegated to that team." and the dialog stays open.
Your team must hold the robot with "Read & Write" rights to delegate it. A robot your team only holds as "Read" shows no "Delegate to Team" entry.
Delegate several robots at once
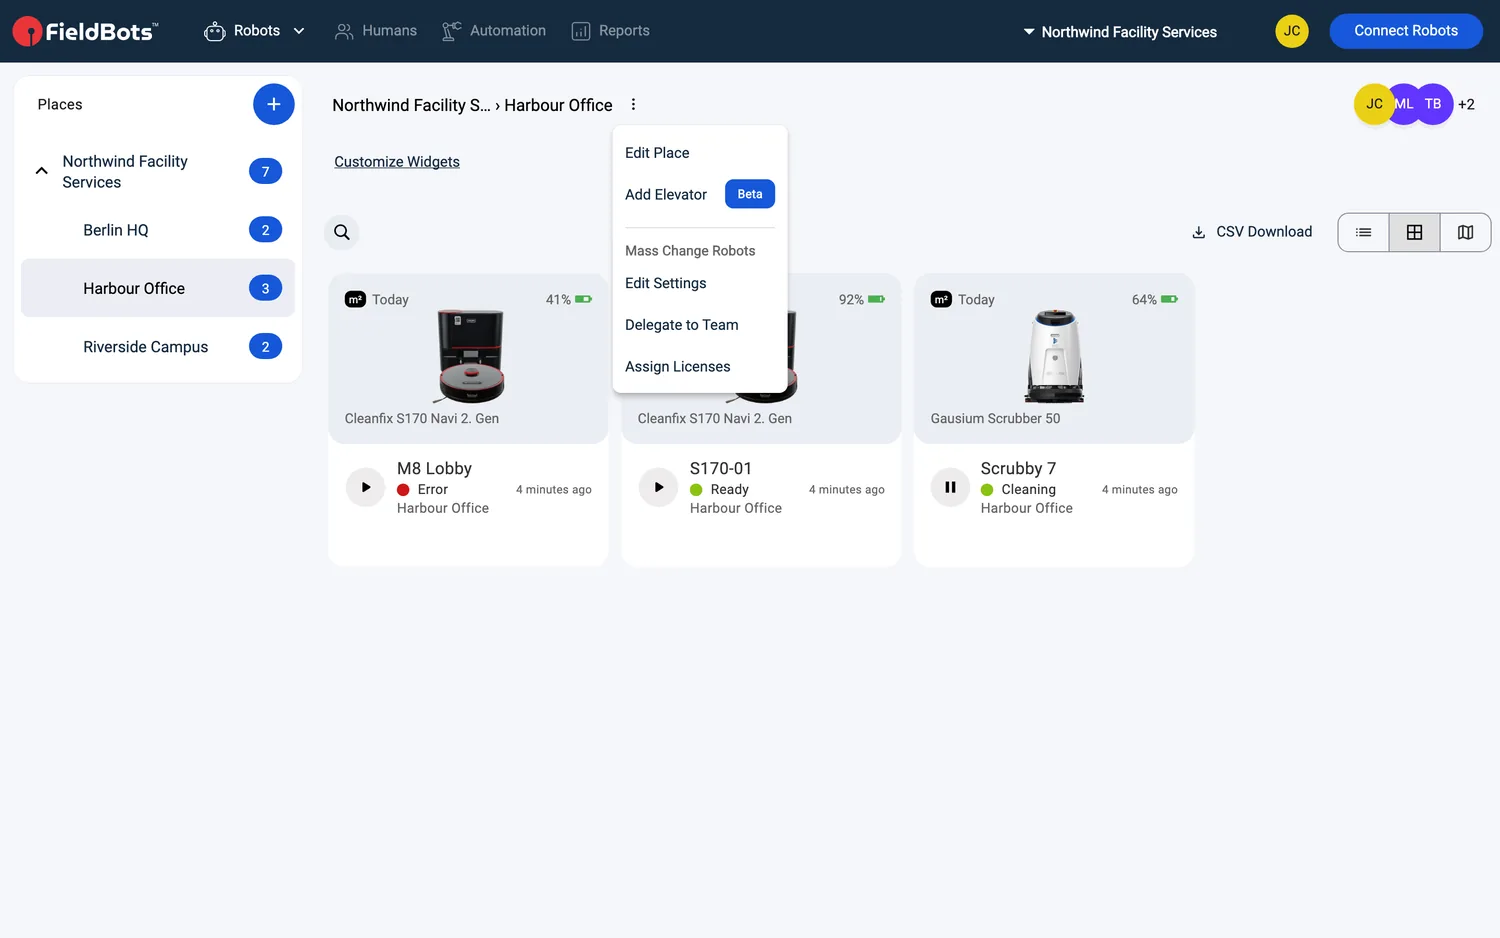
- Open a place in the Places sidebar — or "Unassigned" — click "⋮" in the place header and choose "Delegate to Team".
- In the dialog ("Delegate ‹number› Robots to Team"), pick the receiving team — your own team is not offered — and the "Permission Level", with a "Data Window" if you need one. The "Read & Write" warning applies just the same.
- Click "Delegate All". A confirmation reports "‹number› robots delegated".
- Robots the receiving team already holds are skipped.
Web / Mobile: The flows are the same; on phones the dialogs open as full-screen pages.
What the receiving team sees
- The robot appears in their fleet alongside their own robots.
- On the robot's page, a "Delegated From" row names the team that shared it — its name, "Team ID ‹number›" and, for a distributor team, the "Distributor" tag. Hovering shows the granted rights. (The team that handed the robot out sees its rows under "Delegated To".)
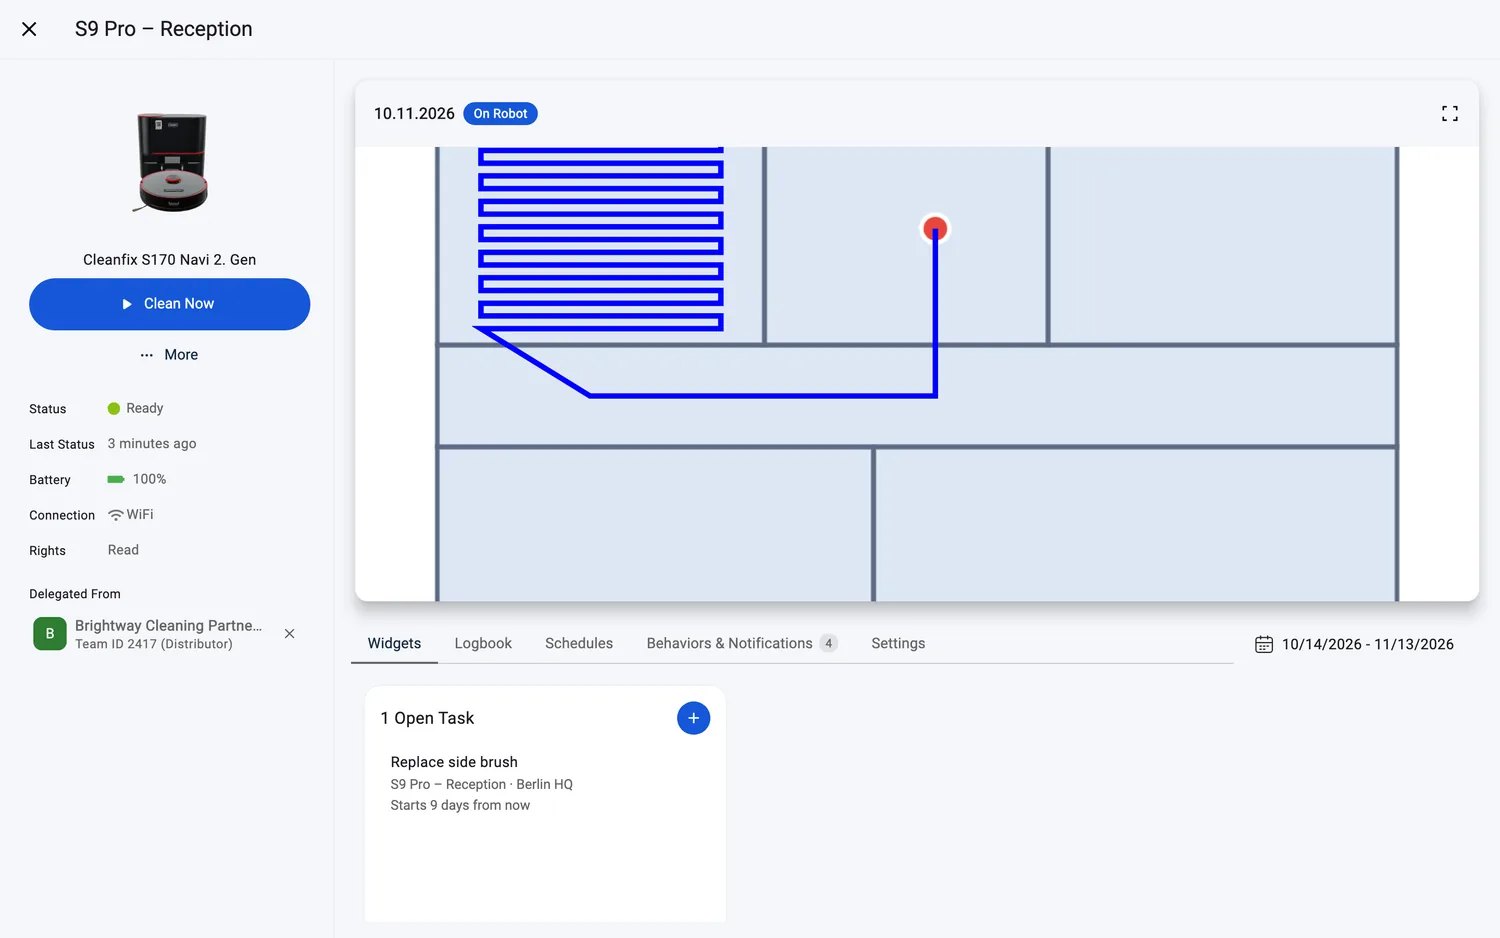
- The "Rights" row shows "Read" or "Read & Write".
- A team with "Read" rights can view the robot but not operate it — and cannot pass it on. A team with "Read & Write" rights can delegate it further.
- A row is a link ("Switch to ‹team name›") for people who are also members of the sharing team; for everyone else it is plain text.
Edit or stop a delegation
- Change a delegation you handed out: click its "Delegated To" row → "Edit Delegation for ‹team name›" — adjust "Permission Level" or "Data Window" and click "Save". A confirmation reads "Delegation Updated". If you are also a member of that team, the dialog offers a "Switch to ‹team name›" link under its title.
- Stop it: open the same dialog and click the red "Delete" → confirm "Remove the delegation to ‹team name›? The team loses access to this robot." ("Remove Delegation"). A confirmation reads "Delegation Revoked".
- Give a robot back that you received: click "Return" (the undo icon) next to its delegation row. A confirmation reads "Delegation Returned".
- Don't want a robot you received as "Read"? The ✕ on the "Delegated From" row removes it: "‹robot name› will be removed from your team. It stays with its owner team."
Editing, revoking and returning are Manager actions.
Supported robot models
Works with every robot — delegation is per robot and per team; no model dependency.
Notes and limits
- "Read & Write" changes who operates the robot: the receiving team takes over and your team keeps only read permission — "This action cannot be undone." Read the warning as a final step, not a formality.
- Revoking takes effect immediately: the receiving team loses access right away.
- A robot can be delegated to the same team only once.
- You can share a robot with more than one team; each "Delegated To" row carries its own rights and data window.
- The robot remains in your fleet throughout — a delegation adds access for the other team, it does not move the robot to their account.