
What it is
Set the defaults for every robot of a manufacturer in one place: suction power, acoustic feedback, language and model-specific options like cleaning speed or carpet boost. Robots that use default settings follow your change right away; robots with their own settings keep them.
Who uses it
Managers keep a brand's fleet consistent and connect the manufacturer accounts; Technicians and Operators tune the settings; read-only members view the pages.
Steps
Open a manufacturer's settings
- Open the team switcher — the team name in the header — and select "Team Settings". The entry is available to Managers and Operators.
- In the settings list, find the "Manufacturers" section and select a brand — for example "Cleanfix", "Robot Sweeper" or "Zaco". Brands your team uses are listed first; "Show All" unfolds the brands without robots.
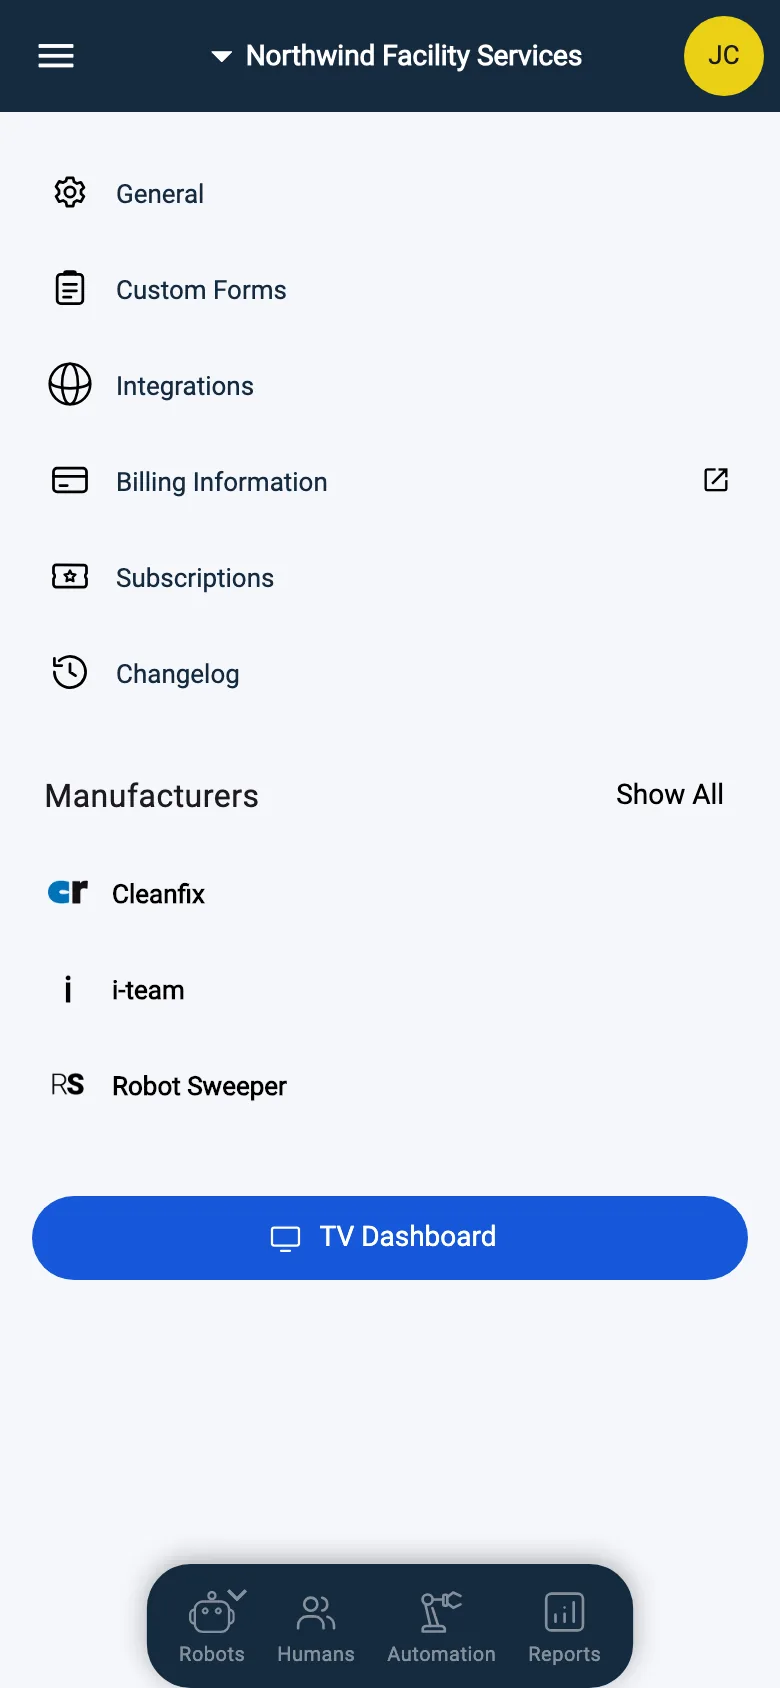
- The brand's settings page opens.
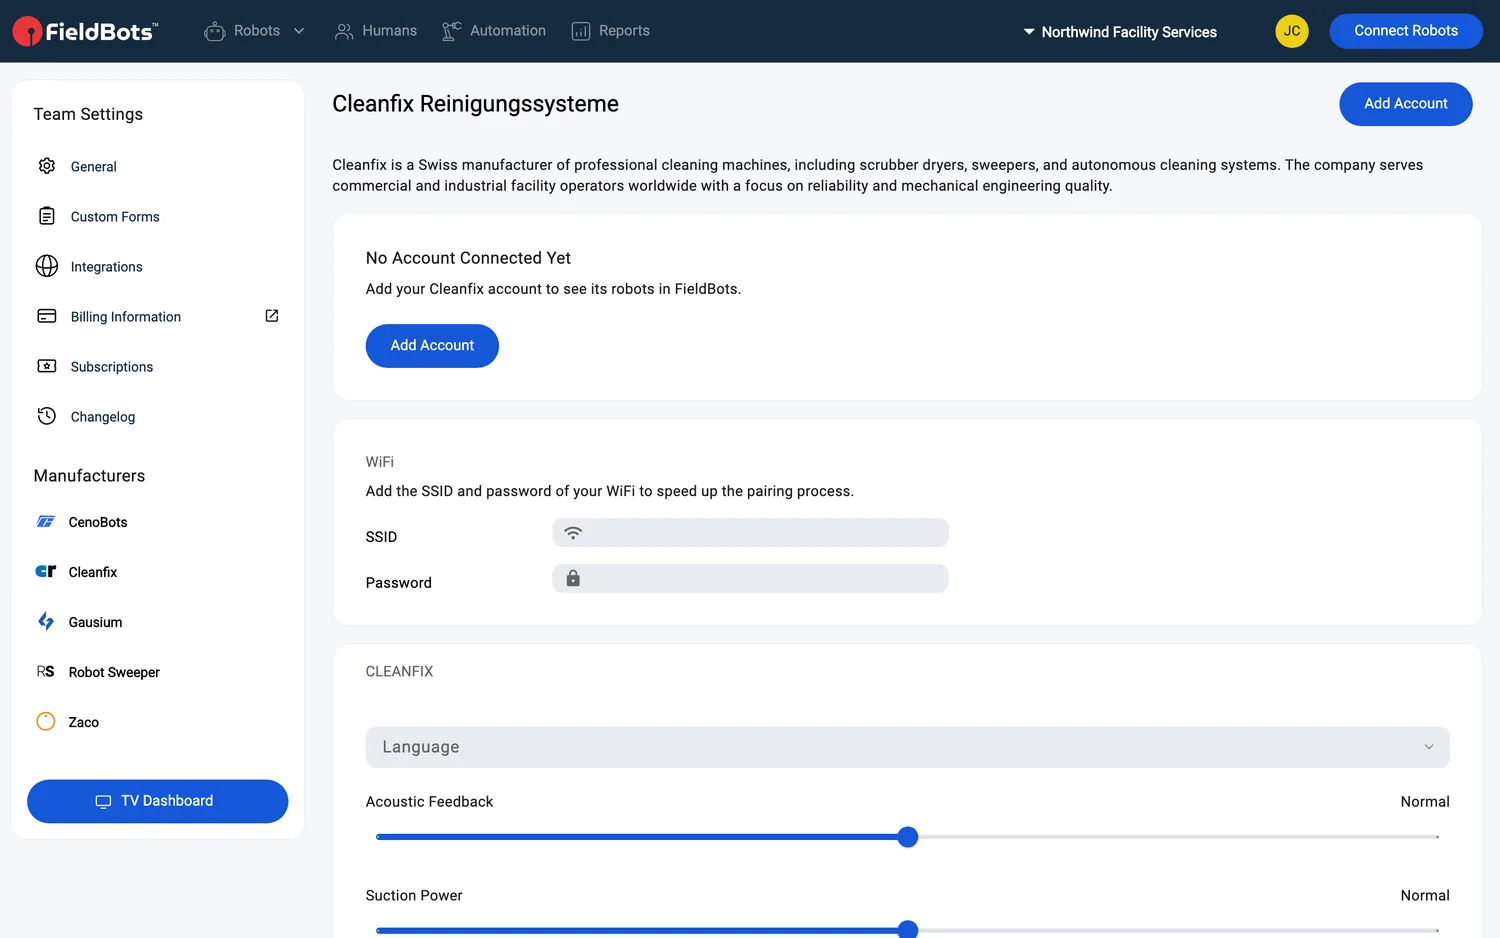
Depending on the brand, the page holds: the manufacturer account (cloud brands), your team's WiFi details (brands that pair over Wi-Fi), and the settings panel. On a robot's own page, the same panel appears in the robot's "Settings" tab, together with the robot's "Use Default Settings" switch.
Web / Mobile: on the web, the settings list sits in the left panel; on a phone, you open it from the header. The entries and settings are the same on both — only the layout differs.
Change the team-wide defaults
- Adjust the settings right on the brand's page. There is no save button — every change is applied right away and reaches the brand's robots that use default settings.
- Which settings you see depends on the model; this is the full range:
- "Language" — the language the robot speaks, for example English, Deutsch or Français.
- "Acoustic Feedback" — a slider with "Quiet", "Normal" and "Loud".
- "Suction Power" — a slider with "Quiet", "Normal", "Strong" and "Max".
- "Water Level" — "None", "Low" or "High".
- "Cleaning Speed" — "Careful", "Normal" or "Fast".
- "Obstacle Sensitivity" — "Standard" or "Sensitive".
- On/off options such as "Carpet Boost", "Y-Pattern Mopping", "Deep Cleaning", "AI Recognition", "Resume After Recharging" and "No Acoustic Feedback in Time Window" (with "From" and "Until" times).
- Below them, three maintenance options appear for Technicians and Managers: "Don't Make Bots Search for the Dock", "Improve Speed by About 10%" and "Ignore Infrared Signals".
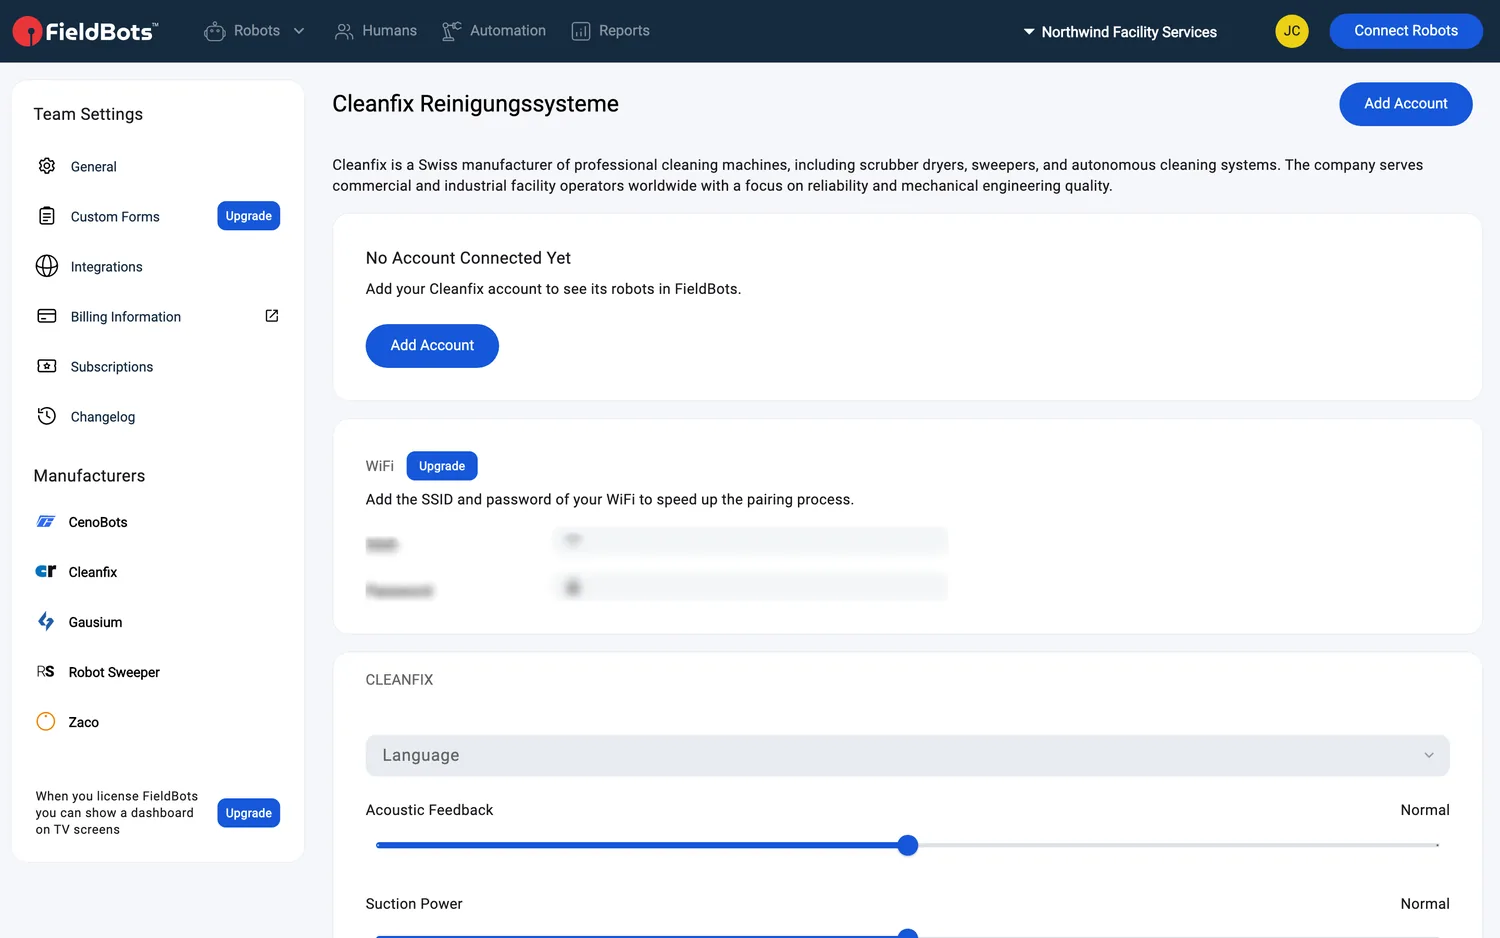
For cloud manufacturers, the account box above the settings manages the connection (see below). For brands that pair over Wi-Fi, your team's "WiFi" details sit there too — "Add the SSID and password of your WiFi to speed up the pairing process." In a Free team the "WiFi" box carries an "Upgrade" tag and its two fields cannot be edited.
Connect the brand's account (cloud manufacturers)
- Managers connect the manufacturer's cloud with "Add Account" on the brand's page. A brand without an account shows "No Account Connected Yet" and the "Add Account" button. The fields depend on the manufacturer — for example "Client ID" and "Client Secret", "Username" and "Password", or "API Key" and "API Password"; some manufacturers also ask for a "Region".
- Each account card shows "Connected" or "Disconnected", the account name and the robots it brings ("12 robots"). A red "Disconnected" opens a short explanation of what to check.
- Card menu (Managers): "Edit Account" or "Remove". Removing stops the sync of that account's robots; FieldBots asks "Remove Account?" first.
Give one robot its own settings
- Open the robot's page and select the "Settings" tab. Managers and Operators see the tab.
- At the top, the robot's details: "Name" and its "Place" tree.
- Switch "Use Default Settings" off to give this robot its own values — the panel below is the robot's own. Switch it back on and the robot follows the team defaults again. In a Free team and on a robot without a license, the switch carries an "Upgrade" tag.
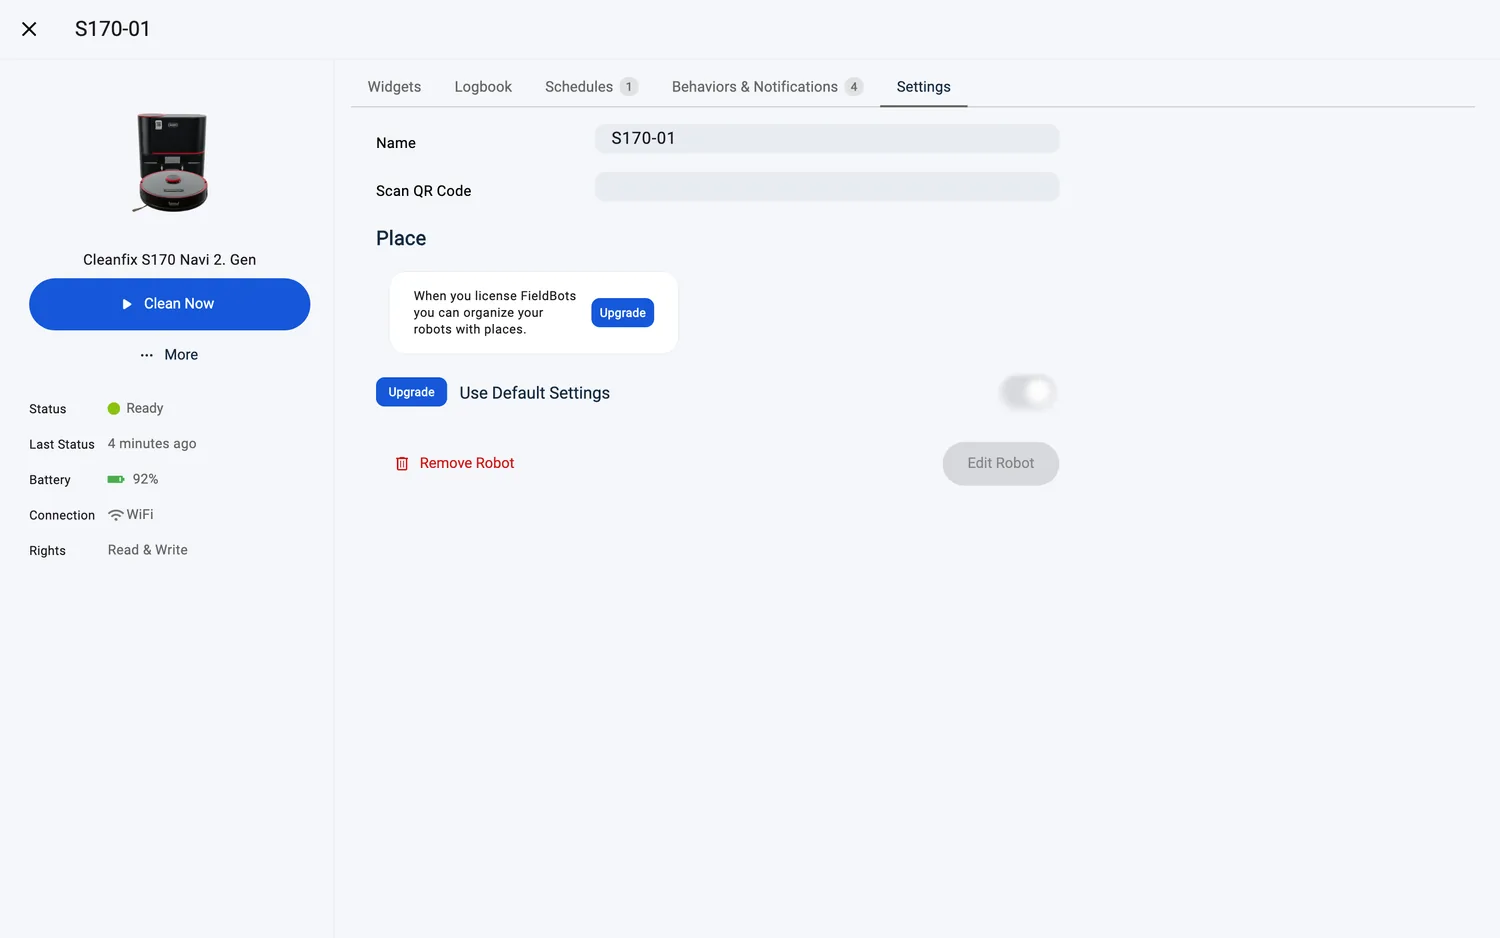
- Change the robot's values in the panel; Technicians and Managers also edit "Initial Cost" and "Monthly Cost" here. A "Custom Picture" row adds the robot's own image. Then click "Edit Robot" to save.
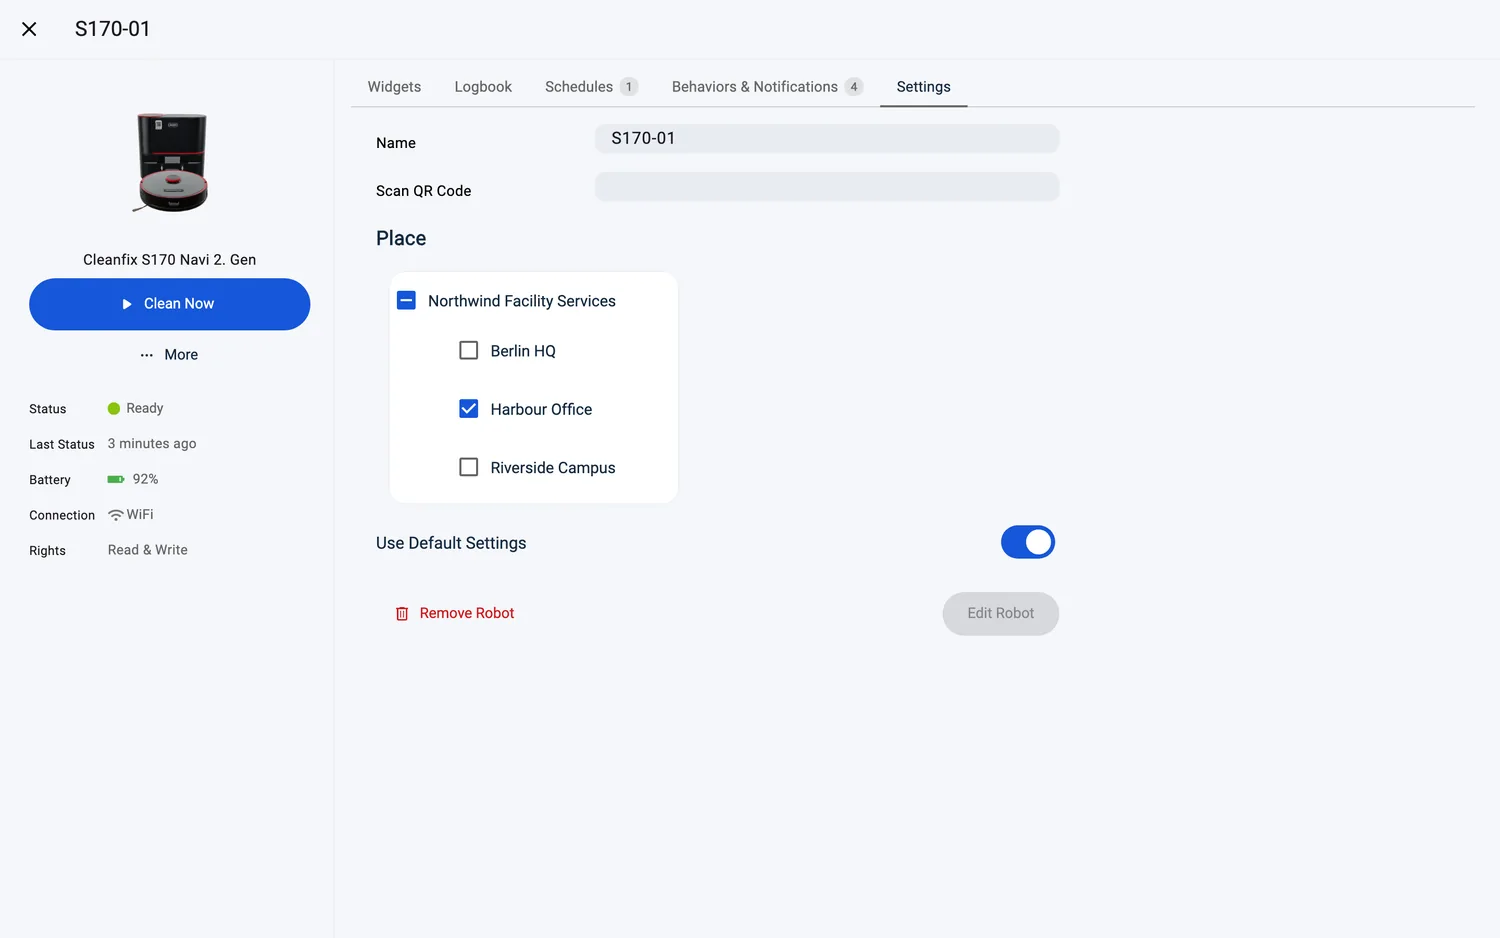
- "Remove Robot" (red) opens a menu — "Keep Historic Data for Statistics" or "Remove Data" — and FieldBots asks "Remove This Robot?" before the robot leaves your fleet. To use the robot again, you have to pair it again.
Web / Mobile: the brand pages open in place on the web and as a full page on a phone; a robot's settings are the "Settings" tab on both.
Supported robot models
Team-wide manufacturer settings are available for 13 models (which individual settings exist varies by model):
Notes and limits
- Team defaults reach a brand's robots that use default settings ("Use Default Settings" on). A robot with its own settings keeps them — that is what the switch is for.
- Changes on the brand's page save themselves (no save button); on a robot's page, "Edit Robot" saves the robot's own values in one go.
- A robot that was shared with you read-only shows its settings greyed out, with "Read-only" tags on the fields.
- One page covers all models of a brand — for example, the "Cleanfix" page holds the defaults for both S170 Navi generations. Which options exist depends on the model.
- The "WiFi" box is one value for your whole team: it appears on the pages of the brands that pair over Wi-Fi (Cleanfix, Genius, i-team and Robot Sweeper), is the same on each, and only speeds up pairing.
- Cloud manufacturers without direct device settings show their account connection here and nothing else.
- You will also land on a brand's page from Connect Robots: pick a cloud model and use "Go to Manufacturer Settings" to connect the account.