
What it is
Bring your whole team into FieldBots — office staff, supervisors, operators and technicians. You invite people by email and give each one exactly the access they need, from a "Manager" who runs the team to a read-only member who only follows along. Access is managed per team; sharing robots between teams is covered by Delegate Robots.
Who uses it
Managers, who set up the team and control who sees which places. Every member has a personal page with their Logbook and account settings.
Steps
See the team's members
- Open the "Humans" menu and select "Users and Access". The page lists every member with "Name", "Email", "Role" and "Places".
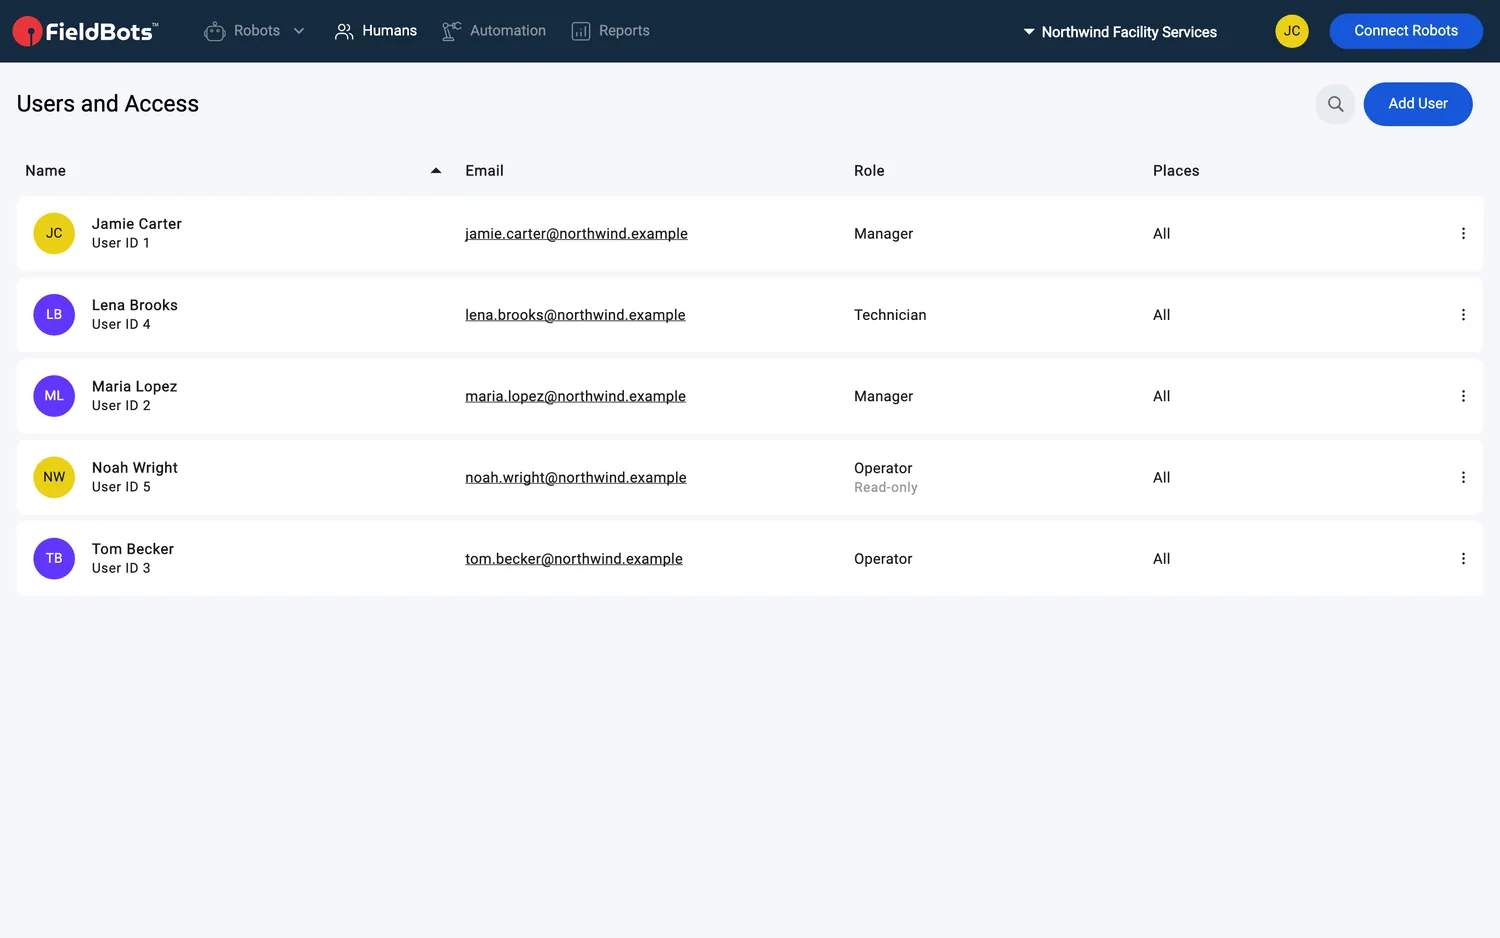
- Every name cell carries the member's "User ID ‹number›". A "Read-only" note under a role marks read access only; "Places" shows "All" or the places the member is restricted to. Click a member's row to open their page.
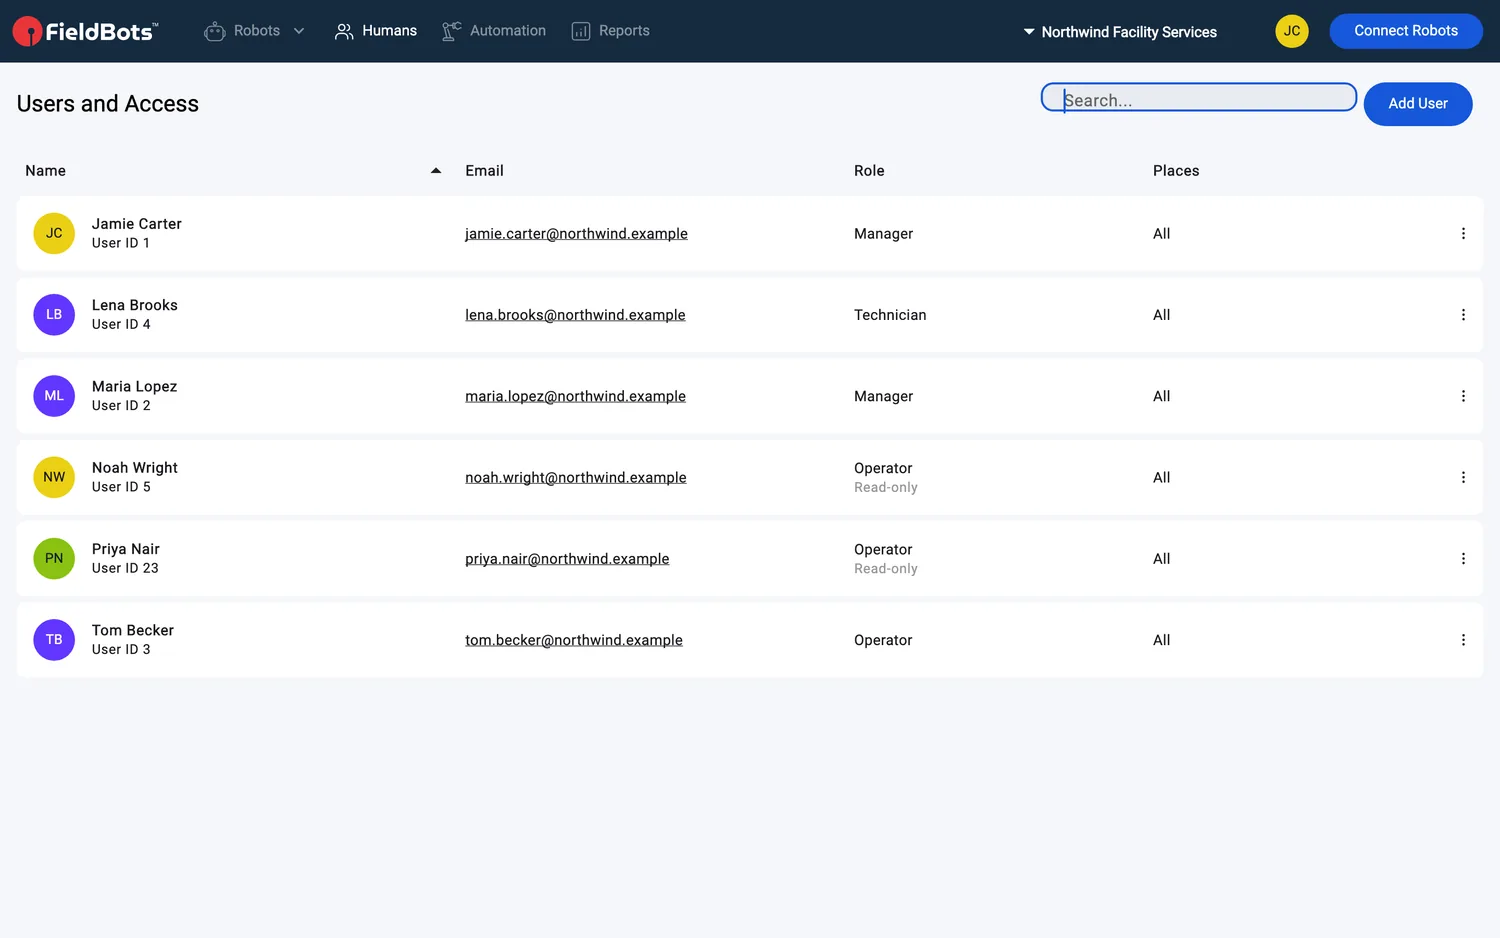
- A search box beside the title narrows the list by name or email address; a click on a column header sorts the list.
Web / Mobile: On phones the list hides the "Email", "Role" and "Places" columns; the name cell then shows the email above the "User ID ‹number›".
Invite a team member
- Click "Add User" in the page header.
- Type the person's "Email".
- An address without a FieldBots account: fill in "Given Name" and "Family Name".
- An address with a FieldBots account already: the name fields fill in and lock — the account is added to your team.
- In the "Role" card, switch on what fits:
- "Manager" — "Connect users and manufacturers, set up your team"
- "Operator" — "Operate your robots daily, schedule them, get reports."
- "Technician" — "Maintain your robots, manage consumables and licenses."
- With "Operator" switched on, choose "Rights": "Read & Write" or "Read & Comment".
- Optional: switch "Access to All Places" off and tick the places the member should see — the places tree unfolds right below the switch. The member then finds only those places and their robots.
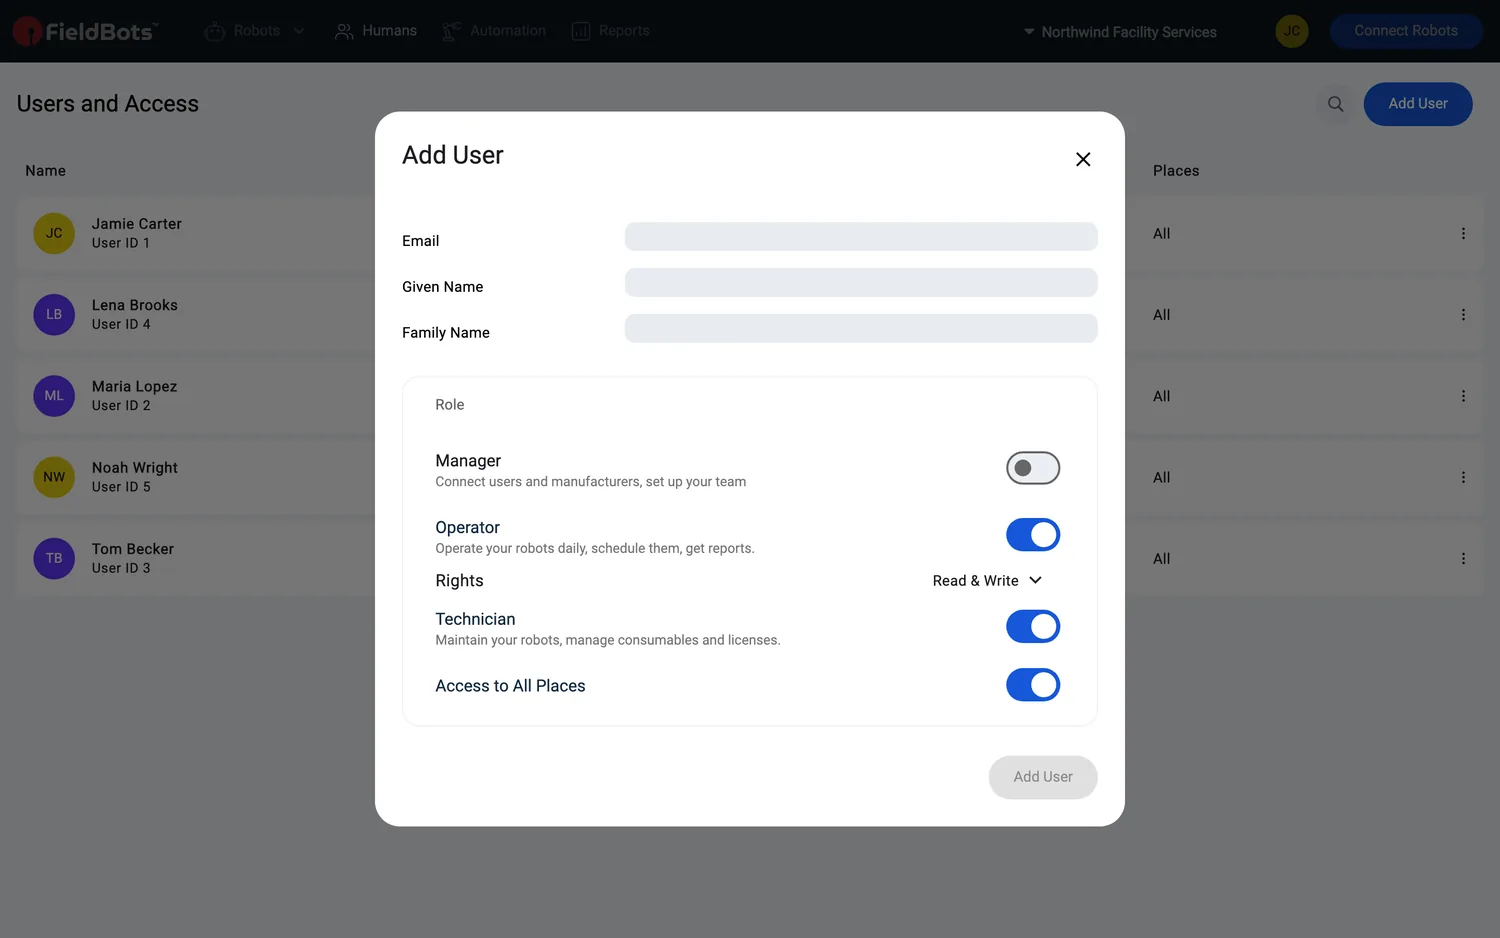
- Click "Add User". The member appears in the list; it scrolls to them.
The person's page
- A click on a member opens their page on its "Settings" tab; the "Logbook" tab sits next to it. Your own page also opens from your account menu ("Settings" or "Logbook").
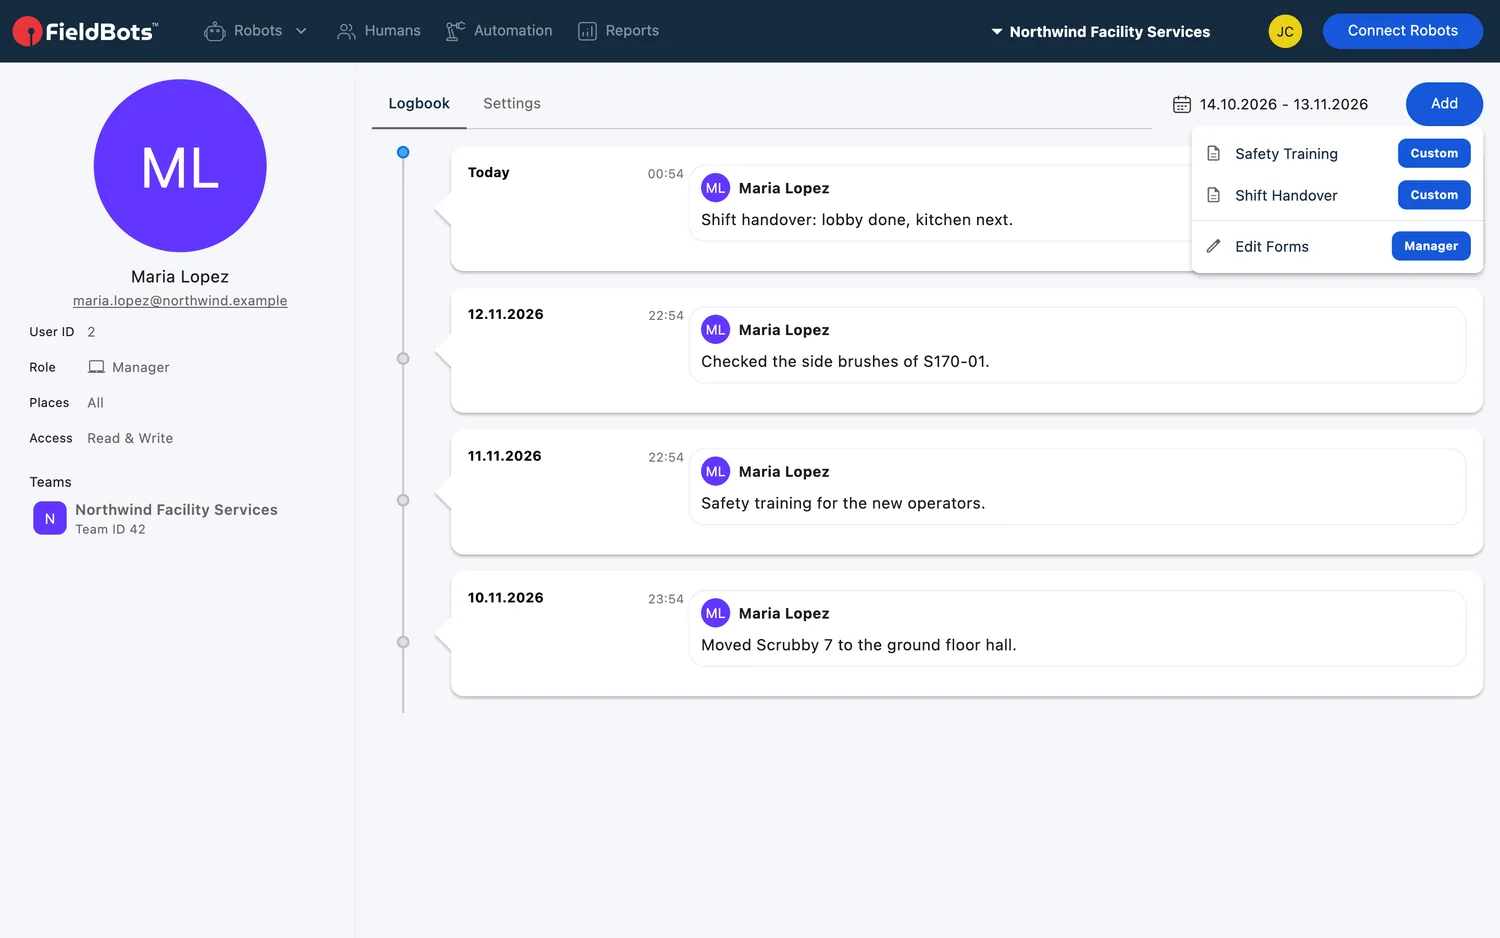
- The left column shows the person: picture, name, email, "User ID", "Role" (with role icons), "Places" ("All" or the restricted ones) and "Access" ("Read & Write" or "Read-only").
- Under "Teams", rows list the teams you and this person have in common — a click ("Switch to ‹team name›") switches your view to that team.
- The "Logbook" tab collects what happened around this person — task entries and robot events — with a date-range menu (the last 30 days by default) and "Load More". The Add menu holds the team's Human forms; Managers also find "Edit Forms" at its end (on a Free team: "Edit Forms (Upgrade)").
- On your own page you can add, change or remove your picture.
Roles, rights and places
- On a member's "Settings" tab, edit the person's account: their names sit at the top, then the "Role" card.
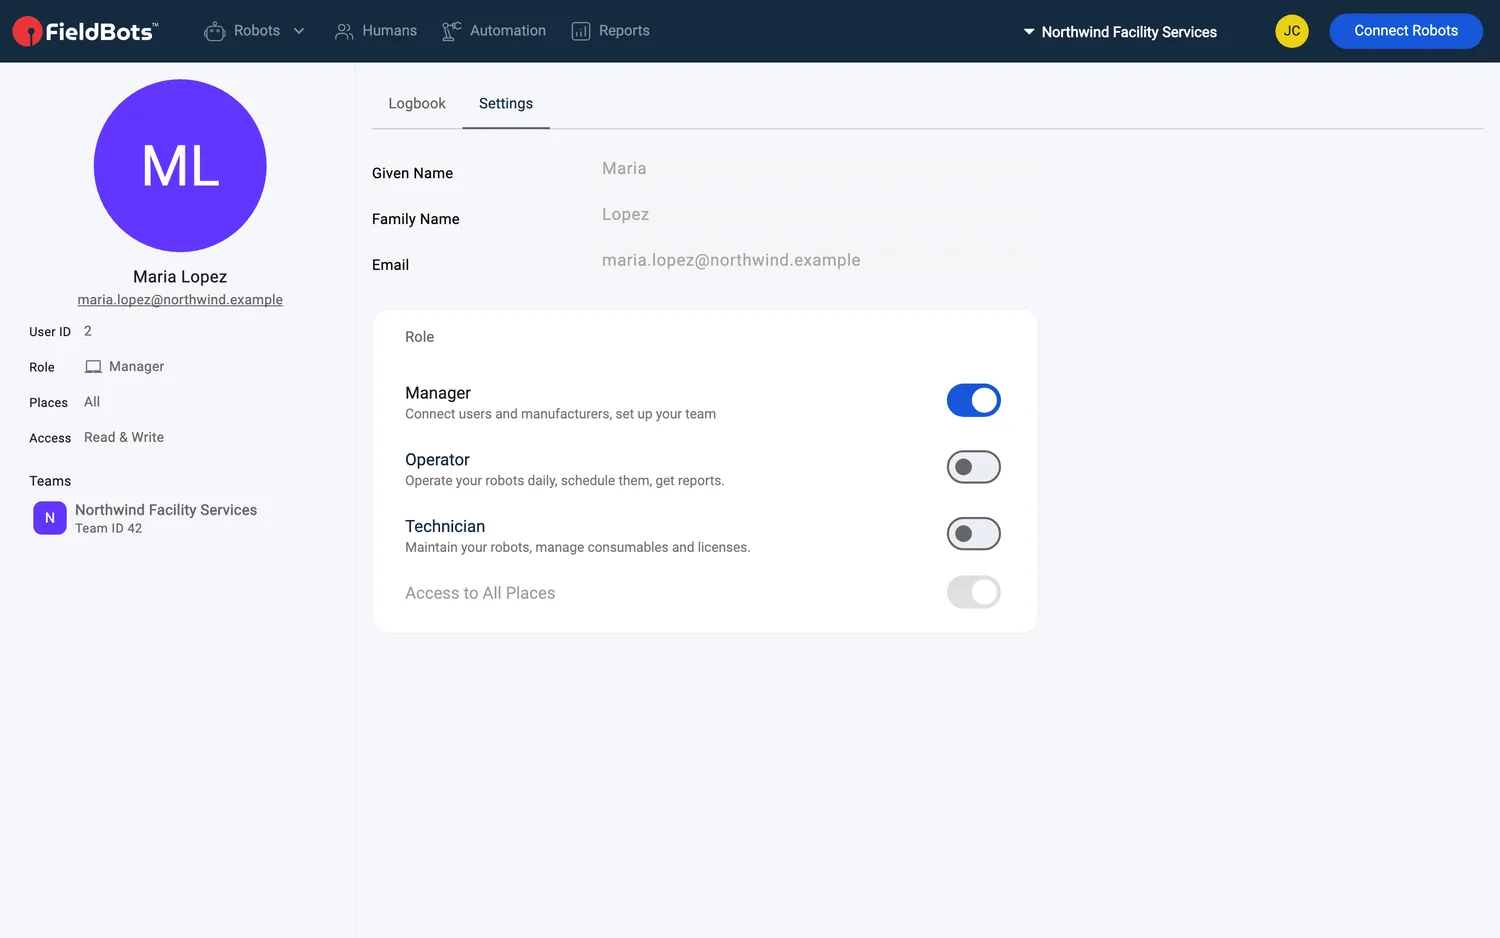
- In the "Role" card, switch on what fits:
- "Manager" — a Manager always reaches every place.
- "Operator" — choose "Rights": "Read & Write" or "Read & Comment".
- "Technician".
- "Access to All Places" stays on by default; switch it off and tick the places the member should see — the tree unfolds right below the switch.
- FieldBots refuses to demote the last Manager: "Team Needs a Manager" — "Every team needs at least one manager. Make someone else a manager before removing this one."
- The "Security" card holds the account's sign-in settings: "Two-Factor Authentication" — a Manager can switch it on for a member, too — and "Request Email Change"; on your own page you also find "Set Up Passkey" and "Reset Password" here.
- Click "Edit User" to save (on your own page: "Save Settings").
Password help and removal
- The "⋮" next to a member holds their account actions: "Send Invite Again" repeats the invitation; "Reset Password" sends a reset email — "‹mail› has received a mail from us."
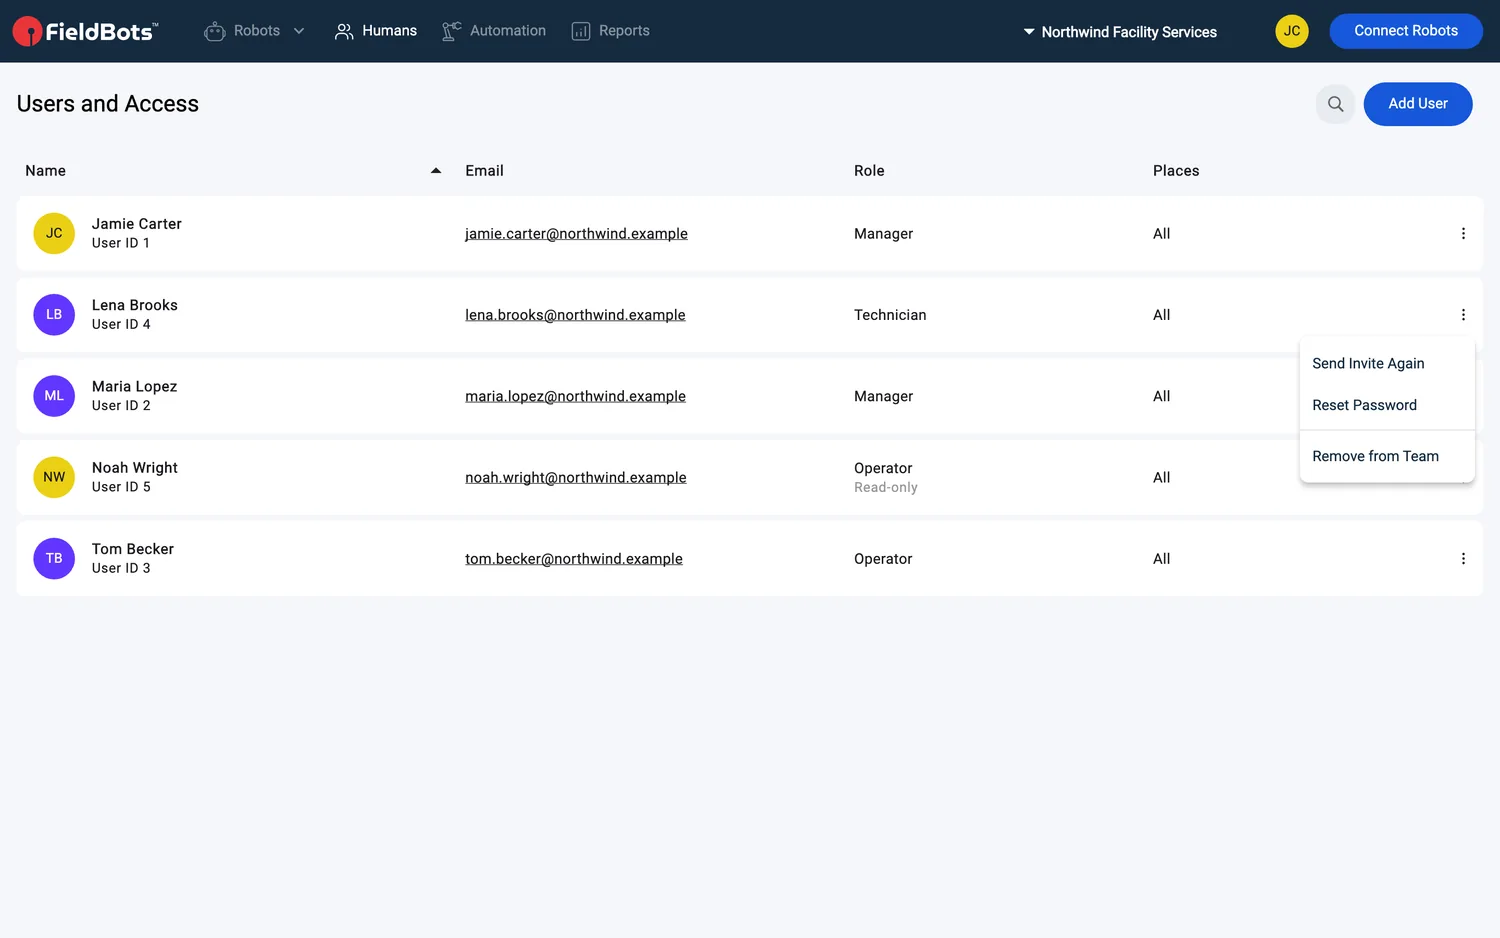
- Below the divider sits "Remove from Team" → confirm "Remove ‹name› from this team? They lose access to its robots, schedules and reports. Their FieldBots account stays." On your own row the menu offers "Leave Team" → "Leave this team? You lose access to its robots, schedules and reports until a manager invites you again."
- The last Manager cannot be removed or leave — FieldBots asks you to make someone else a manager first.
Supported robot models
Not robot-specific — applies to your whole team; robot access is scoped per team/delegation, places, and (for some actions) the robot's read/write permission.
Notes and limits
- Access is limited by place, not by robot: "Access to All Places" off restricts a member to specific places and their robots, but there is no setting that allows or blocks single robots for one user. To share a single robot with another team, use Delegate Robots.
- Removing a member cuts off the team's robots, schedules and reports at once; their FieldBots account stays.
- Invitations and password emails go to the address you entered — a wrong address strands the invite.
- Adding an email that already has a FieldBots account simply adds that account to your team; its name fields stay locked.
- Every team needs at least one Manager.
- On a Free team every member joins as a Manager, the search is hidden and the role options stay locked; clicking the member avatars of a place shows "When you license FieldBots you can give users granular access." with an "Upgrade" tag.